If you can use a computer and have access to Oracle Eloqua, you can build a responsive landing page.
Effective digital marketing requires beautiful landing pages that look great no matter the device used to view them. You may want to create your own responsive webpage to streamline your marketing workflow but dismiss the idea, thinking you have to be a coding whiz. Not anymore! Oracle Eloqua now allows you to build rich, responsive landing pages all by yourself. So, gather your campaign content and see what you can create!
First off, you may not know what “responsive” means with regard to landing pages. Basically, responsive means to adjust to the environment. Have you ever opened a webpage on your desktop where everything looked great, then opened it on your mobile phone to find images overlap the text, or you have to scroll to read everything? That landing page is not responsive. Responsive pages scale to fit the device where they are displayed, whether it be desktop, tablet or mobile.
To access the Oracle Eloqua Landing Page Design Editor, make sure you have security access to create landing pages. Check with your Eloqua administrator if you are not sure. Once that is out of the way, you can begin creating responsive landing pages without touching a bit of code!
When creating your landing page, the following browsers have been identified as the most commonly used clients and have been tested for responsive or mobile-friendly elements. Your page may display differently if viewed using a different browser:
- Firefox
- Chrome
- IE11
- Edge
- Safari
So, let’s build a Responsive Landing Page!
- Log in to your Eloqua instance.
- Click on Assets Landing Pages.
- Click on “Create a Landing Page.”
- Select “Blank Responsive Landing Page” to build a fully responsive landing page from scratch, or choose one of the other layout options.
- You can also select a predefined Company Template if available.
- Select “Blank Responsive Landing Page” to build a fully responsive landing page from scratch, or choose one of the other layout options.
If you selected the Blank Responsive Landing Page, your screen should look like this:

You will see several icons to the left of the canvas:
 Design Components
 Landing Page Style
 Landing Page Settings
Design Components:
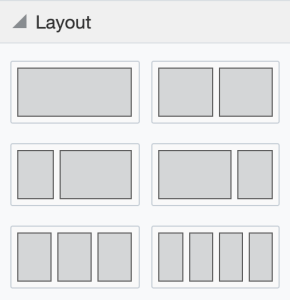
In this area of the Editor, you will choose the layout and content of your landing page. The Content blocks are items that can be added to a selected layout.
Layouts:
Content Blocks:
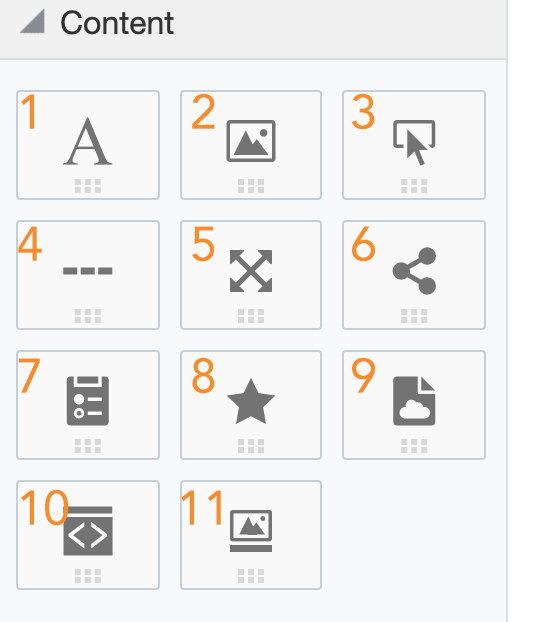
- Text
- Image
- Button
- Divider
- Spacer
- Shared Content
- Form
- Dynamic Content
- Cloud Content
- Custom Code
- Carousel
- Choose an initial layout for your email. A one-block layout is the default.
- Click on the layout, and drag and drop it to the canvas.
- Select a layout section, then click and drag content to that area.
- Add layout and content blocks as needed.
Content Type Details:

 |
Text: Click to add text – you will see all your formatting tools appear including field merge and hyperlink buttons. You also have the option to write from right to left using the button.Tip: When inserting hyperlinks, you have an option to select Lightbox as your link type. |
 |
Image: Click to add image – select image from the image library, or upload an image. |
 |
Button: Click to add button. Click on the button to format, change button text and add hyperlink. |
 |
Shared Content: Click on Browse to add Shared Content. * |
 |
Form: Click to add Eloqua forms to your landing page. Select the form on your landing page to show the general formatting properties on the left side of your screen. You can also edit or replace your form in this area. |
 |
Dynamic Content: Click on Browse to add Dynamic Content. * |
 |
Cloud Content: Click on Browse to add Cloud Content. * |
 |
Custom Code: Add custom code to your email. This content type requires coding knowledge. |
 |
Carousel: Add an image carousel to cycle through several images automatically. You may specify a speed, or have it function manually. |
*Please view the Oracle Help Center working with landing page content blocks and layouts for more detailed information.
Note: Oracle Eloqua validates that dynamic and shared content is responsive. If issues are found, a notification ![]() appears. Click the notification icon to review the issues. You can make your edits in the Design editor or from the component library. The icon will change to
appears. Click the notification icon to review the issues. You can make your edits in the Design editor or from the component library. The icon will change to ![]() when no responsive concerns remain.
when no responsive concerns remain.
You will see several helpful icons on the left and right side of each component.

- Move content block or layout
- Copy content block or layout
- Delete content block or layout
Landing Page Style:
In this area, you will select the style of your Landing Page:

Background Color and Styling
- Click the color box to select a color, or type in the hex code.
- Select Color Fill Style and Canvas Color.
- Select your Canvas Width.
- Background Video
- A video can be set to play in the background by providing a URL.
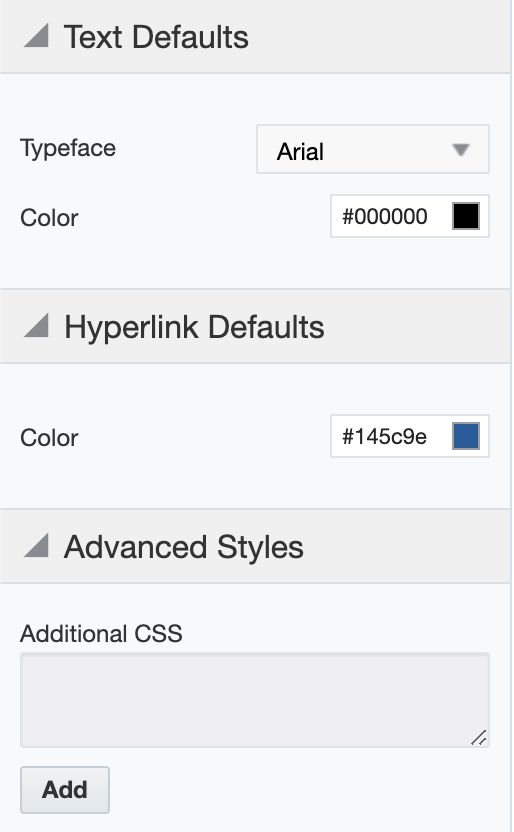
Text Defaults
- Select the default font and color.
- Hyperlink Defaults
- Select the color of the text that contains a hyperlink.
Advanced Styles
- Add additional CSS styling if needed (you will need some coding experience for this section).
Landing Page Settings:
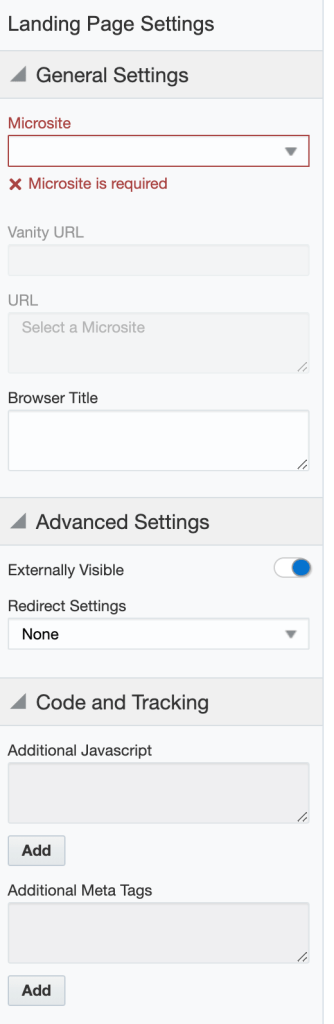
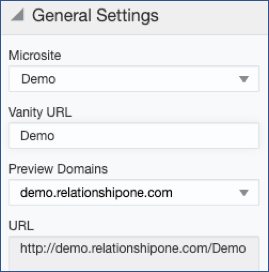
General Settings:
- Microsite – A microsite Is required to launch your landing page.
- Vanity URL – If used, the vanity URL must be unique.
Advanced Settings:
- Externally Visible – if toggled off, visitors will not be able to view the page.
- You may want to use this setting if an event is complete and you want to prevent visitors from signing up, or if you are drafting a new landing page and want to block access until it’s ready for production.
- Redirect Settings – After a set period of time, performs a specified action in the visitor’s Web browser.
- Redirect to a different page
- Automatically close the window
Code and Tracking:
- Add Javascript or meta tags to your landing page.
Preview and test
You can use the preview and test features to check page performance and get feedback.
- Use the toggle
 in the menu bar and make any adjustments such as padding and forced text breaks.
 - Preview your landing page on different screen sizes and by using different contacts.
- You will need to save your landing page first.
- Select Actions > Preview
- Select a Contact.
- View in desktop, tablet or mobile views.
- Select a Contact.
- Send the landing page URL to others on your team.
- Select the Landing Page Settings Icon
- You will find the Landing Page URL in the General Settings.
- Click the link to launch the page, then copy the link to send to others.
- Select the Landing Page Settings Icon