First, the What:
Signature Rules in Oracle Eloqua. Did you know that it’s possible to dynamically set the sender information for emails sent from Eloqua? It’s like dynamic content, but for the From and Reply-To Addresses on your email.
Next, the Why:
Let’s say your company has sales representatives across multiple regions and you want to send product release emails on behalf of each rep. Instead of building out a separate version of each email for every rep, you can utilize Signature Rules. This is especially helpful if you’re already using dynamic content to personalize the body of the email, and you’d like the sender information to match.
Last, the How:
Signature rules aren’t super difficult to set up, but there are a few steps you need to take – and a few things to keep in mind along the way – in order to get started:
- Identify the key field in your Eloqua data that can determine sender information. This might be a contact field such as a territory ID, a salesperson field, or a record owner ID. Or you can use a field in a Custom Object or Event Registration. Ideally, the field should be populated on every record in your segment, but it’s OK if it’s not 100% populated, since there is a default option in Oracle Eloqua’s Signature Rules.
- Make sure your users are set up. The Eloqua user record stores the From/Reply-To information we’ll use when setting up the Signature Rules, so we need to make sure there is a user for each sender variation.
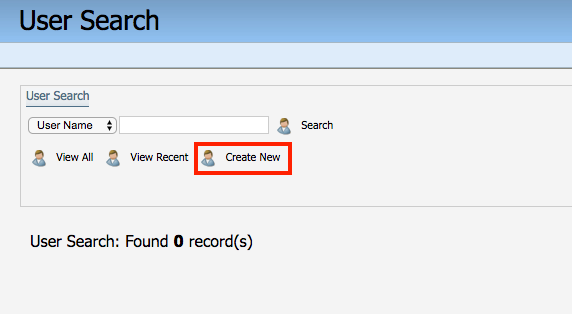
Sticking with our example above, if your sales reps are already using Eloqua, then you can skip this part! If not, we’ll need to create users. This can be done on a single user basis, or you can upload multiple users. To create a single user, navigate to Settings and click Users. From there, you can use the search feature to check if a user already exists, or easily create one by clicking on Create New.
After clicking Create New, you’ll need to populate the following fields for your Signature Rule.
First the standard user fields
- First Name, Last Name: You know what to put here!
- Email Address: If you’re setting up a sales user, be sure to use a live email address. You’ll be given the option to send a New User Welcome email, which will be sent to this address
- User Display Name: This is generated from First and Last Name, but can be customized. Keep in mind this is the field used to identify the user in the Signature Rule Setup area.
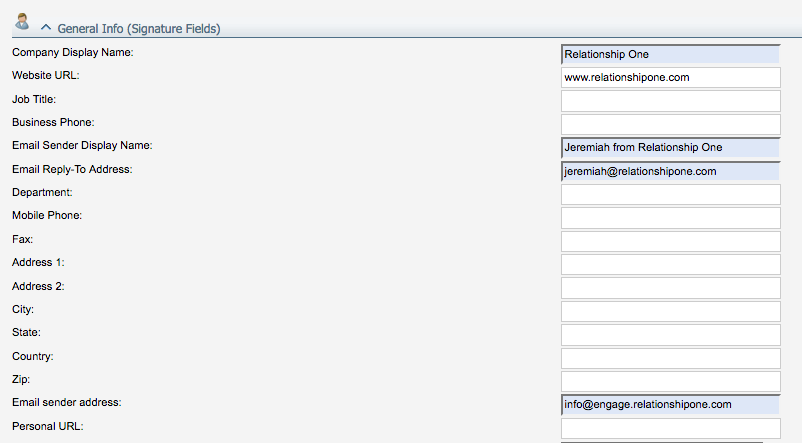
Next, the Signature fields (you may need to click the drop-down arrow next to General Info (Signature Fields) to see this section
- Email Sender Display Name: This is what shows up as the From Name in your email. When creating a new Signature Rule setup, this is also the default Reply-To Display Name.
- Email Reply-To Address: This is the address most email clients use when a user hits the “Reply-To” button. This should also be a real inbox.
Note: if you have a high number of values you plan to use in your Signature Rule, make sure this value is unique for every user. When uploading Signature Rule mappings, Eloqua uses this field as the unique identifier for the user.
- Email Sender Address: This is the From Address. As a best practice, this should match the sender address you use for all outbound campaigns. Ideally, avoid sending from a top-level domain – use a subdomain instead.
Pro Tip: Read more about avoiding the spam folder, or boosting your Gmail deliverability.
Now that you’ve set up your users, you’re ready to move on to the Signature Rule setup. Navigate to Assets > Email Setup > Signature Rules and click New.
If you only have a handful of values, enter individually by clicking the + button. Enter the field value, and select the user you created as the Email Sender.
You can also upload mappings by clicking the Actions (>>) menu and clicking Upload Mappings. You’ll need a spreadsheet with two columns, Field Value and Email Sender. Keep in mind that Email Sender needs to be the Email Reply-To Address we set on the user record.

Once you’re done adding your mappings, be sure to hit Save.
Now you’re ready to use Signature Rules! Just one last step. When you’re setting up your campaign, be sure to check the box Use a Signature on your email settings. Select the Signature Rule you want to use and you’re all set!

Ready to set up Signature Rules in your Eloqua instance but need a little extra support? Let us know! Or maybe you’re already using Signature Rules and you want to roll it out to a larger group? Tell us about your experience in the comments below or fill out this form and someone will follow up with you.