The blind form submit. Or, as I like to call it, the Swiss Army Knife in your digital marketing toolbox. Want to dynamically redirect a user to a specific landing page? Build a blind form submit link. Want to pass contact values to a CDO, an account, directly to your CRM – or better yet – all three at once? Use a blind form. How about sending a notification email to a sales rep when a contact clicks through high value content in an email? Blind form!
If you’ve set up blind forms before, you probably know about this great generator or this quick guide on the basics of a blind form submit URL. But if you’re new to the world of blind form submits or you want to brush up on the details of how to set one up, this blog post is for you.
First, the What:
Basically, it’s an Oracle Eloqua form. There is no blind form submit, without the form. The only difference is that, usually, an Eloqua form needs to sit on an Eloqua or third party landing page. But with a blind form, we’re skipping the landing page and posting data straight Eloqua. Hence the name, blind form.
Then, the Why:
It’s simple – collect basic responses from your contacts with only one click. Great for subscribing or registering without much effort on their end. Instead of filling out and completing a form on a landing page, contacts click one button to commit.
Finally, the How:
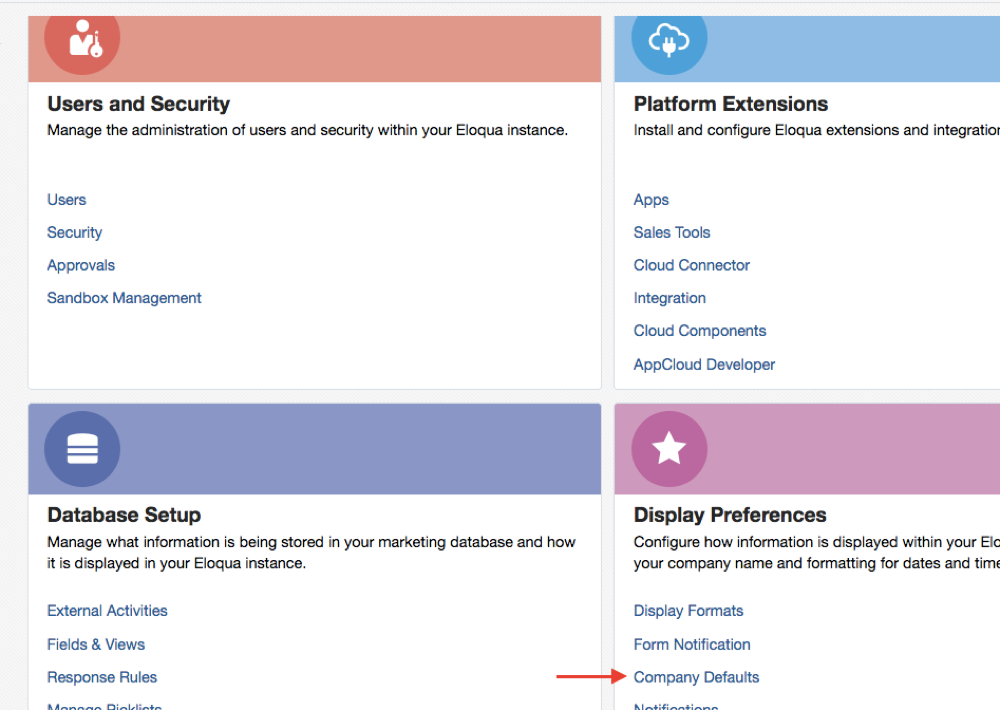
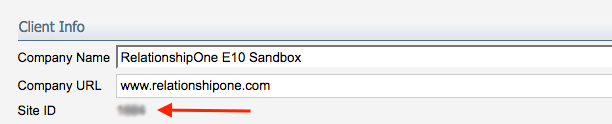
To get started, you’ll need to find your Eloqua Site ID. You’ll use the Site ID when building the URL for your blind form submit, and the easiest way to find it is to navigate to the settings menu (that gear-like icon in the top right corner of your Eloqua window) and then to Company Defaults. From Company Defaults, you’ll see your Site ID listed right after your Company Name and Company URL.
Now that you have your Site ID, you’re ready to start building your form.
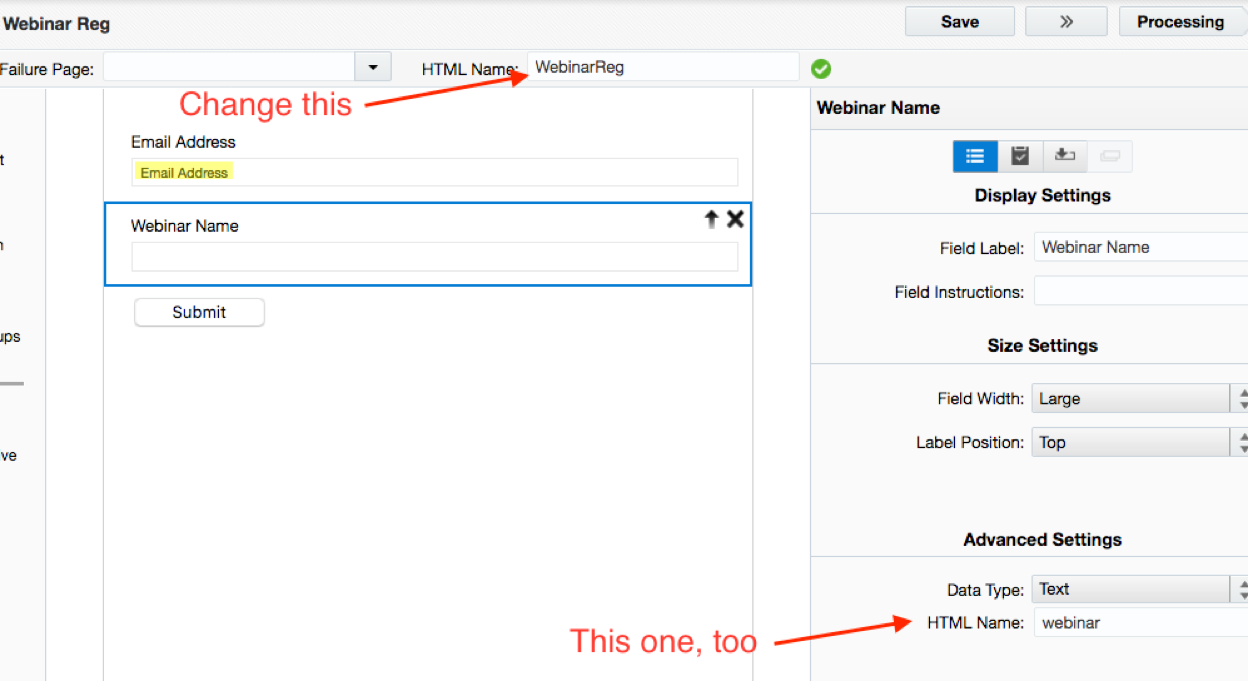
Let’s say you’re hosting a webinar and you want to send out an email with an RSVP button. All you need is a simple form with email address and a custom field or two to capture some pre-defined information. Once you’ve built the form, do yourself a favor and change HTML name to something short, unique and memorable. While you’re at it, change the html names for your custom fields as well. This will save you from potential headaches when you’re building or troubleshooting the URL.
Now that you’ve built your form, you’re ready to start assembling the submit link. Every blind form submit needs the following:
- https://s####.t.eloqua.com/e/f2: This is the base URL for every form post. Replace the # signs with your Site ID.
- ?elqFormName=WebinarReg: This is how Eloqua knows which form to submit the information. Remember, we changed the name to WebinarReg so the link is easier to build.
- &elqSiteID=####: This is Eloqua knows which instance you’re using. Again, replace the # with your Site ID.
- &emailAddress=<span%20class=eloquaemail>EmailAddress: You don’t have to change this part at all.
*Pro Tip: The %20 is just a fancy html way of including a space, since URLs don’t typically include spaces. You can always use %20 to put a space in in other field values without breaking the blind form submit link.
Those are the basics. If you want to add any other custom fields and values, use this simple formula: &FieldHTMLname=value. For example, if we want to pass the value of Product Demo into the Webinar Name field, it’ll look like this &webinar=Product%20Demo (see what I did with that %20 there? Fancy.)
Let’s put it all together:
https://s####.t.eloqua.com/e/f2?elqFormName=WebinarReg&elqSiteID=####&emailAddress=<span%20class=eloquaemail>EmailAddress&webinar=Product%20Demo
Now you’re ready for the fun part!
The form processing steps. Going back to our Swiss Army Knife metaphor, this is where we bust out the scissors, toothpick, can opener and corkscrew. The form processing steps in Oracle Eloqua open up a huge range of possibilities in terms of defining the user experience for the contacts that click through your blind form submit link. Sure, there are the standard steps like Update Contact – With Form Data, Send Submitter an Email, and Redirect to Web Page. But that’s just the beginning! Continuing our webinar example, we could also utilize processing steps like:
- Update Event Registration: Use Eloqua’s Event Module to manage reminders, send confirmation emails, and so much more. Check out this blog post for event module insights.
- Add to Campaign: Add the contact into a nurture campaign and collect more profile information for future marketing efforts.
- Update Custom Data Object: Capture a record of every webinar the contact has registered for by updating a CDO. Get even more sophisticated with Update Custom Object – With Custom Values and set a data stamp for each time the contact has clicked through.
- Run Integration Rules: This one requires a little more set up, but allows you to pass one or more values directly to your CRM.
Almost Done…
You’ve built your form, added the fields you want to track, built your URL and set your uber-powerful processing steps. What now? Add your newly created blind form submit link to your email and test away. You’ll be ready to deploy that awesome email in no time.
Still have question or need help setting up a particularly tricky blind form submit? Let us know! We’re always happy to help.