In part 1 of this Tool Tip blog, you learned how to use existing templates in Oracle Eloqua. As promised, I’m back to teach you how to create brand new templates. Get ready!
Creating New Templates
Create a New Email or Landing page template:
To create a new Email or Landing Page Template you can follow these steps:
- Create and SAVE a new Email or Landing Page or open an existing Email or Landing Page
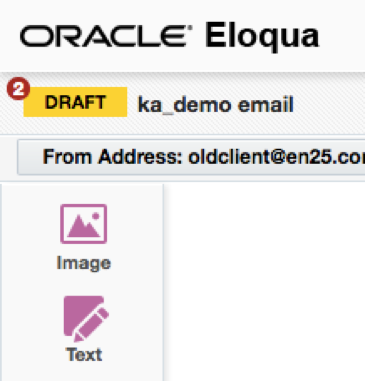
- Make sure you have no draft errors
- If you do see the little red numbers, you can double click on them to find out what the error are for and you can correct them and Save your email again.
- Make sure you have no draft errors
- Click on the Actions button “>>” found next to the Save button and select “Save As Template”
- Select a Name for your template
- (optional) Enter a Description
- (optional) Text to Display Link: This links to a file or location on another website that could provide information for users when creating emails using this template.
- (optional) URL for Link: This field contains the URL to which the user will be redirected upon clicking on the link text.
- (optional) Location: Select the location in which your template will be saved.
- Select the “Use Thumbnail” checkbox if you want a thumbnail image of your template to be shown in the Template Chooser.
- After you have Saved your template, it will be available to use as a Template to create a new Email or Landing page.
- You can edit the Templates from the Template Manger which will be discussed in this document.
Create New Templates for Campaigns Canvas, Forms, Program Canvas and Segments
Creating these templates is pretty much the same as creating them for Landing Pages and Email, except you do not have the “Template Manager” option.
“Save As” a Template
To make a new Template you can follow these steps:
- Create and SAVE a new Campaign Canvas, Form, Program Canvas or Segment, or open an existing Campaign Canvas, Form, Program or Segment.
- Make sure you have no draft errors
- If you do see the little red numbers, you can double click on them to find out what the error are for and you can correct them and Save your email again.
- Make sure you have no draft errors
- To “Save As” a Template
- For Campaign Canvas, click on the File menu item and click on “Save As Template”
- For Forms, click on the Actions button “>>” found next to the Save button and select “Save As Template”
- For Program Canvas, click on the File menu item and click on “Save As Template”
- For Segments, click on the Actions button “>>” found next to the Save button and select “Save As Template”
- Select a Name for your template
- (optional) Enter a Description
- (optional) Text to Display Link: This links to a file or location on another website that could provide information for users when creating emails using this template.
- (optional) URL for Link: This field contains the URL to which the user will be redirected upon clicking on the link text.
- (optional) Location: Select the location in which your template will be saved.
- Select the “Use Thumbnail” checkbox if you want a thumbnail image of your template to be shown in the Template Chooser or Select an Icon.
- After you have Saved your template, it will be available to use as a Template to create new Campaigns, Forms, Programs or Segments.
Template Manager
Here is where all the control happens! This is where you are able to protect the precious templates you created.
The Template Manager is available for Emails and Landing Pages. You must have template manager permissions to access this feature.
Note: To grant template manager permissions, you will need to access the Users and Security section found in Settings à Users. Select the Groups tab, select your group and then click on Action Permissions, Click on Edit and select “Manage Templates in the Template Manager section found all the way at the bottom of the page. Click Save.
The Template Manager allows you to create and modify templates for Eloqua users in your instance. You also have the option to assign very detailed settings to all areas of your Emails and Landing Pages. Assets can be placed in Protected Mode, then you are able to define specific areas to be modified when the new asset is created. This allows you to maintain brand consistency across your Campaigns and ensures important messaging is included in all emails and landing pages.
Using Protected Mode for your Templates
You can access the Protected mode option provided with your Email and Landing Page Templates from the “Template Manager”.
Email Template Manager – Design Emails
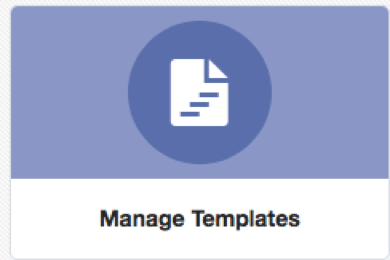
- Click on Assets -> Emails, then select “Manage Templates”
- Select the Template Type “Design Templates”
- Select the Template you would like to edit and click on Choose in the bottom right corner of your screen
Once your Email Template is Open, you can begin to define specific areas where you want to allow users to modify the email. To begin follow these steps:

- In the upper right corner, you will see two lock icons. One for Lock and one for Unlock.
- Click on the Lock icon to set the Email in “Protected” mode
![]()
- You will notice the status of the email, shown in the top left corner, will change from “Standard” to “Protected”
- Now that your Email is in Protected mode, everything is locked. You will need to select specific items that you want to allow the user to modify or delete when they use this template to create emails.
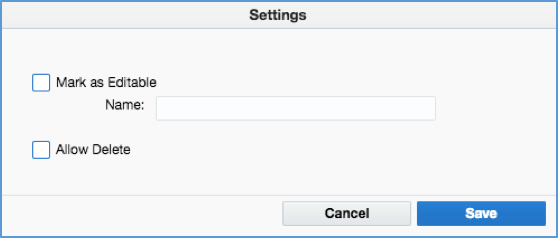
- For each area you want to modify, right click on the item and select “Mark as Editable”
- “Mark as Editable” checkbox
- This allows the user to edit the item
- “Allow Delete” checkbox
- This allows the user to delete the item
- “Mark as Editable” checkbox
- For each area you want to modify, right click on the item and select “Mark as Editable”

- After all items are set, Save the template.
-
- You will see a blue dashed border around the element on the template.
- Any items without the blue dashed border are locked an un-editable.
Landing Page Template Manager using the design editor
Using the Landing Page Template Manager in design mode is very similar to using the Email Template manager for Design Emails as shown above.
- Click on Assets -> Landing Pages then select “Manage Templates
- Select the “Design Template” you would like to edit and click on Choose in the bottom right corner of your screen. (A Design template is a landing page where you do not see the html code, one that was created with the drag and drop tools)
Your Landing Page Design Template should now be open and available to edit.
- In the upper right corner, you will see two lock icons. One for Lock and one for Unlock.
- Click on the Lock icon to set the Landing Page in “Protected” mode
- You will notice the status of the email will change from “Standard” to “Protected”
![]()
- Now that your Landing Page is in Protected mode, everything is locked. You will need to select specific items that you want to all to be modified or deleted from the template.
- For each area, you want to modify
- Right click on the item and select “Mark as Editable”
- “Mark as Editable” checkbox
- This allows the user to edit the item
- “Allow Delete” checkbox
- This allows the user to delete the item
- “Mark as Editable” checkbox
- Right click on the item and select “Mark as Editable”
- After all items are set, Save the template
- You will see a blue dashed border around the element on the template.
Email Template Manager – HTML Emails
Eloqua also allows you to protect your html templates. Please Note; you will need some basic html skills to complete this task.
As with the Design Email templates, you have the option to protect the entire email or define specific areas as editable or deleteable.
- Click on Assets -> Emails, then select “Manage Templates”
- Select the Template Type “HTML Templates”
- Select the HTML Template you would like to edit and click on Choose in the bottom right corner of your screen
Now that your Email Template editor is Open, you can begin to define specific areas of the email where you want to allow the user to be able to modify it.
Unlike the Design Template, you will not see the 2 lock icons in the top right corner. To place this template in protected mode you will need to add at least one area in your email as editable. Once you define at least one area as editable, any undefined elements will remain locked. There are a few specific elements that are available to be modified.
The following html elements are available to set as modifiable:
- div, section, article, blockquote, aside, details, summary, figure, fig. caption, footer, header, nav)
- headers (h1, h2, h3, h4, h5, h6)
- img
There are two different code settings that can be placed on the html elements:
The following attributes will need to be placed within the element that you wish to modify.
- elq-edit=”true” This will define a tag/section as editable in a template
- <div elq-edit=”true”> </div>
- <h1 elq-edit=”true”> </h1>
- elq-delete=”true” This will define a tag/section as delete able
- <div elq-delete=”true”> </div>
- <h1 elq-delete=”true”> </h1>
- Example code
- <td bgcolor=”#00c424″ style=”font-family: Arial, Helvetica, sans-serif; font-weight: bold; font-size: 16px; color: #ffffff; padding-left: 10%; padding-right: 5%; padding-top: 10px; padding-bottom: 10px; line-height: 24px; min-width: 100%;” class=”” elq-edit=”true” elq-delete=”true“>
- <img src=”http://images.response.domain.com/EloquaImages/clients/Lexmark/{57c640b8-74f8-49c7-96cf-ea37e1be04dd}_InteriorBanner_SharedServices2015_Postshow-THUMB.jpg” style=”display: block;” width=”120″ class=”” elq-edit=”true” elq-delete=”true“>
- <div elq-edit=”true” class=”h1″> Get more clicks! </div>
- After all items are set, Save the template
- You will see a blue dashed border around the element on the template. Items without the blue dashed border are locked and non-editable.
- When a user creates an HTML email using a Protected template, the source code and design tools are not visible.
- To modify the items that have been designated as editable, the user can right click on the item to view the available options.
Landing Page Template Manager – HTML Emails
As with the Design Landing Page templates, you have the option to protect the entire landing page or define specific areas as editable or deleteable. The attributes are the same as what you have for the html email templates.
- Click on Assets -> Landing Pages then select “Manage Templates
- Select the “HTML Template” you would like to edit and click on Choose in the bottom right corner of your screen.
Now that your Landing page template editor is open, you can begin to define specific areas of the landing page where you want to allow the user to be able to modify it.
Unlike the Landing Page Design Template, you will not see the 2 lock items in the top right corner. To place this template in Protected mode you will need to add at least one area as editable. Once you define at least one area in your landing page as editable, any undefined elements will remain locked. There are a few specific elements that are available to be modified.
The following html elements are available to set as modifiable:
- div, section, article, blockquote, aside, details, summary, figure, fig. caption, footer, header, nav)
- headers (h1, h2, h3, h4, h5, h6)
- img
There are two different code settings that can be placed on the html elements:
The following attributes will need to be placed within the element that you wish to modify.
- elq-edit=”true” This will define a tag/section as editable in a template
- <div elq-edit=”true”> </div>
- <h1 elq-edit=”true”> </h1>
- elq-delete=”true” This will define a tag/section as delete able
- <div elq-delete=”true”> </div>
- <h1 elq-delete=”true”> </h1>
- Example code
- <div elq-edit=”true” class=”h2″> Taco Tuesday </div>
- <td bgcolor=”#00c424″ style=”font-family: Arial, Helvetica, sans-serif; font-weight: bold; font-size: 16px; color: #ffffff; padding-left: 10%; padding-right: 5%; padding-top: 10px; padding-bottom: 10px; line-height: 24px; min-width: 100%;” class=”” elq-edit=”true” elq-delete=”true“>
- <img src=”http://images.response.domain.com/EloquaImages/clients/Lexmark/{57c640b8-74f8-49c7-96cf-ea37e1be04dd}_InteriorBanner_SharedServices2015_Postshow-THUMB.jpg” style=”display: block;” width=”120″ class=”” elq-edit=”true” elq-delete=”true“>
- <div elq-edit=”true” class=”h1″> Get more clicks! </div>
- After all items are set, Save the template
- You will see a blue dashed border around the element on the template. Items without the blue dashed border are locked and non-editable.
- When a user creates an HTML landing page using a Protected template, the source code and design tools are not visible.
- To modify the items that have been designated as editable, the user can right click on the item to view the available options.
I hope you will use templates in your Eloqua instance. It’s a good way to save time when creating assets as well as standardize the look and feel of your Campaigns. Using Segment and form templates limits errors in segment criteria and form processing steps.
Please let me know if you have an questions or need any further information on using, creating and protecting Eloqua templates.